Adding a Custom Behavior Tree
Prerequisite: Basic Usage
Opening the Default Behavior Tree with Groot2
Let’s open the currently defined default behavior tree using Groot2. First, download Groot2 (https://www.behaviortree.dev/groot/), which is actually a GUI tool created for BehaviorTree.CPP. Run Groot2 and open /bt_xml/default_bt.xml. You will then be able to visualize the default behavior tree as shown below.
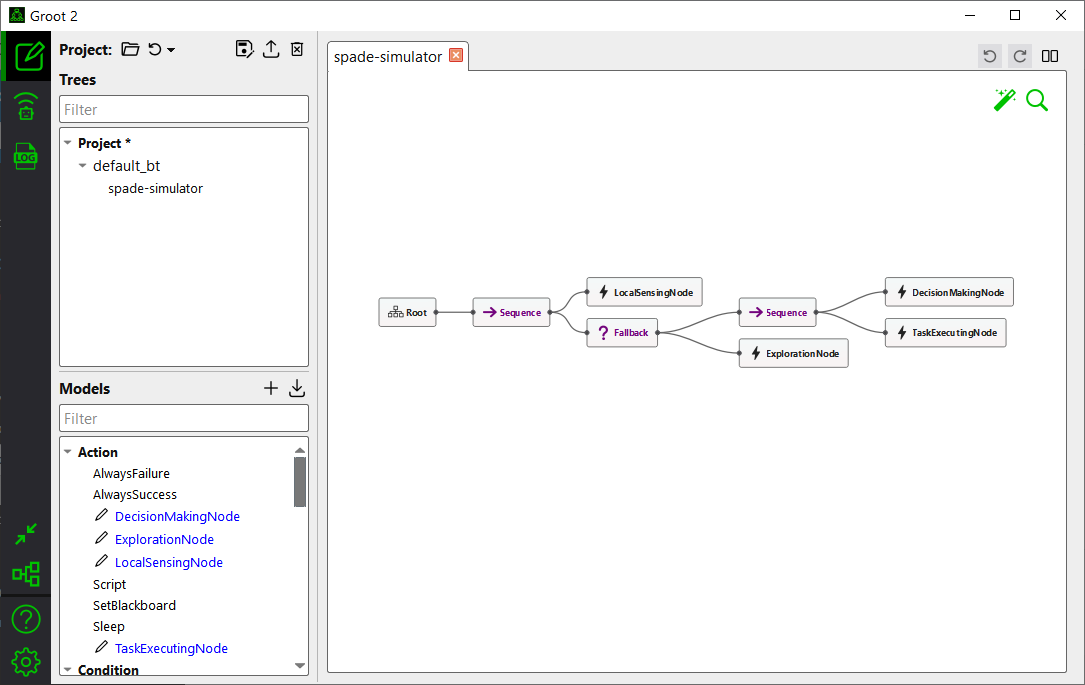
Figure 1: Groot2 with default_bt.xml
Note
Groot2 was originally created for BehaviorTree.CPP, but in the SPADE simulator, only the visualization functionality of the Behavior Tree is used. Therefore, the other features do not work.
In the default behavior tree (i.e., /bt_xml/default_bt.xml), agents start with the LocalSensingNode to detect nearby tasks and messages. They then proceed to the DecisionMakingNode for task assignments, followed by the TaskExecutionNode to perform the task. If no tasks are detected, the agent executes the ExplorationNode to move to a random position and search for tasks.
You can observe this behavior by following the tutorial in Basic Usage, and its simulation result will be similar to the following.
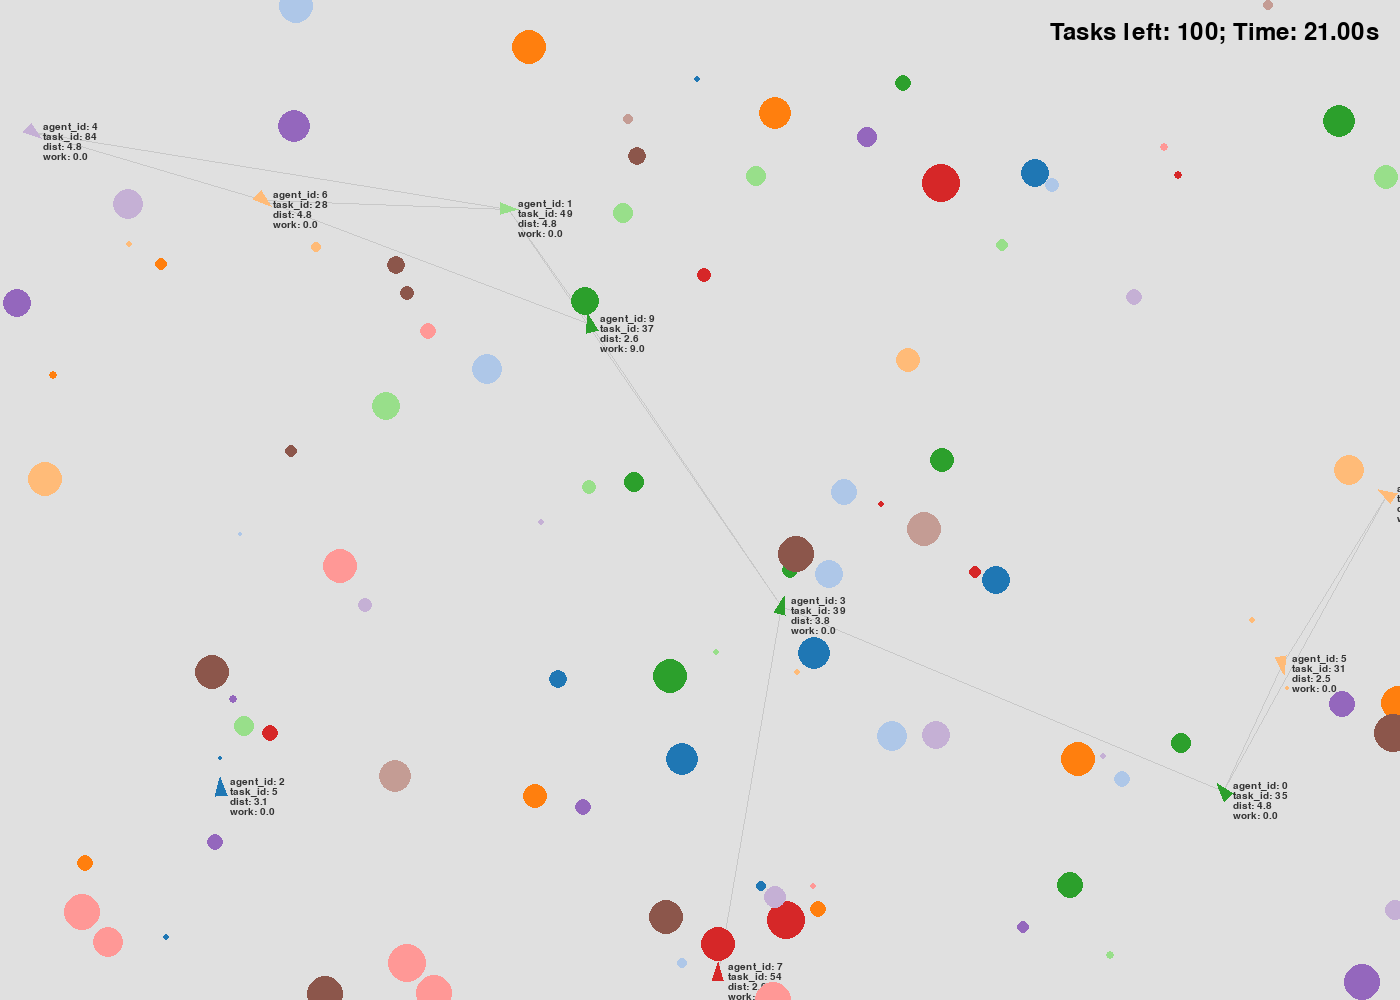
Figure 2: Simulation Visualization
Step 1 - Creating BT Nodes in Groot2
In this tutorial, based on the setting of Basic Usage, we will attempt to modify the behavior tree for another scenario.
Consider a delivery drone scenario. There is a depot located at a specific position, and each drone needs to visit a destination to deliver a package. After completing the delivery, the drone should return to the depot and then proceed to a new task.
To implement this modification, let’s add a new BT (Behavior Tree) node called ReturnToBaseNode in the existing behavior tree. Using Groot2, click the + button to add a new BT node, and then enter ReturnToBaseNode as the node name.
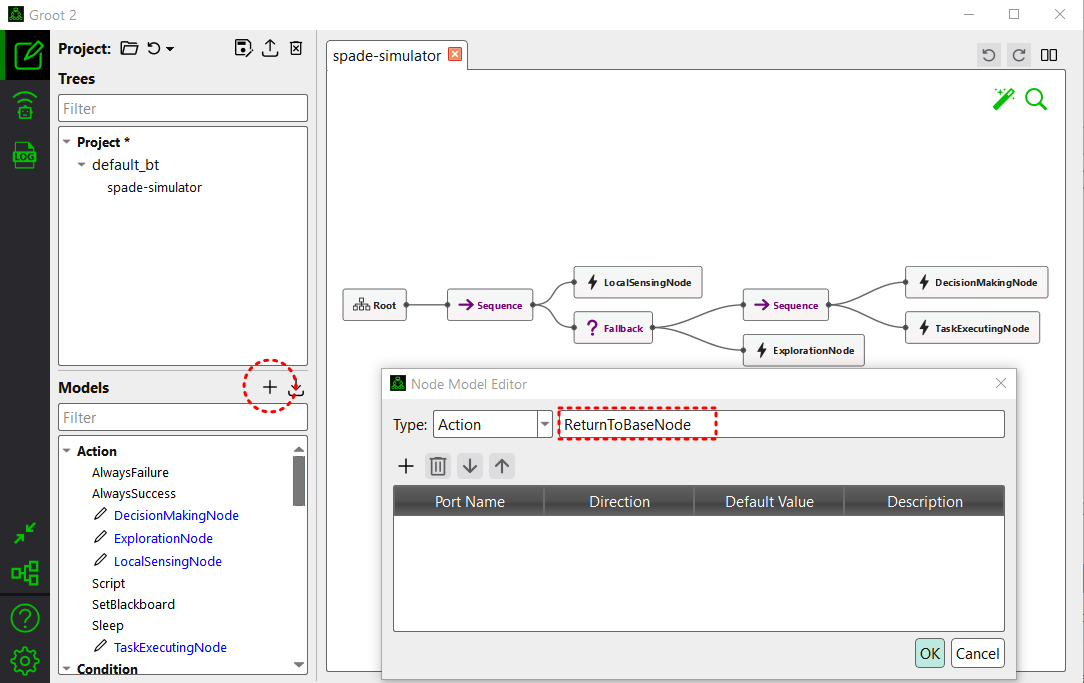
Figure 3: Creating a new node
You should then see ReturnToBaseNode appear in the left Models pane. Click on it and drag-and-drop it onto the canvas.
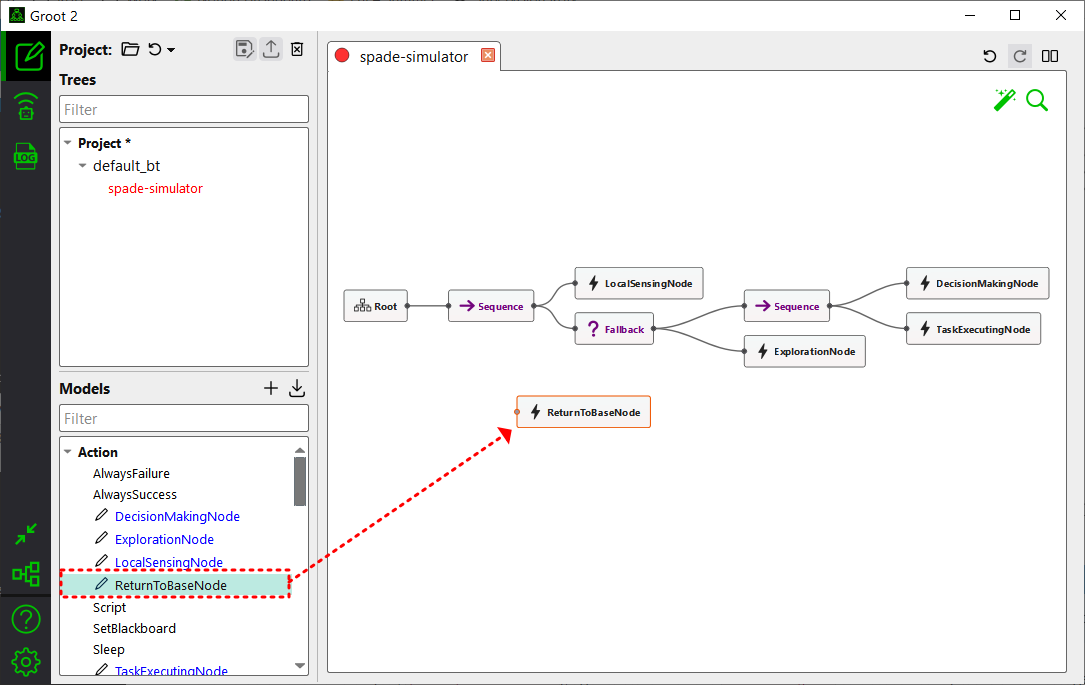
Figure 4: Drag-and-drop the node
Step 2 - Construct a Behavior Tree
Now, we are creating a behavior tree to model the desired behavior using BT nodes.
In the drone delivery scenario, each agent should go to the base after completing a task. There are various ways to implement this as a behavior tree, but let’s proceed with the following approach:
First, place the
ReturnToBaseNodenode at the beginning of the BT.Consider the logic that will run inside the
ReturnToBaseNodenode as follows: At the beginning of the BT,ReturnToBaseNodeshould check if the assigned task has been completed. If it has, the node will move the agent to the base. If the task is not completed,ReturnToBaseNodewill return aFAILUREstatus to its parent, allowing the rest of the BT to continue running. To achieve this, connect theReturnToBaseNodenode to the rest of the BT using aFallbacknode.
To configure the BT, simply drag-and-drop the nodes to position them. Connect the nodes by clicking on the circles on each node’s side and linking them to other nodes as necessary. The modified behavior tree will look as follows.
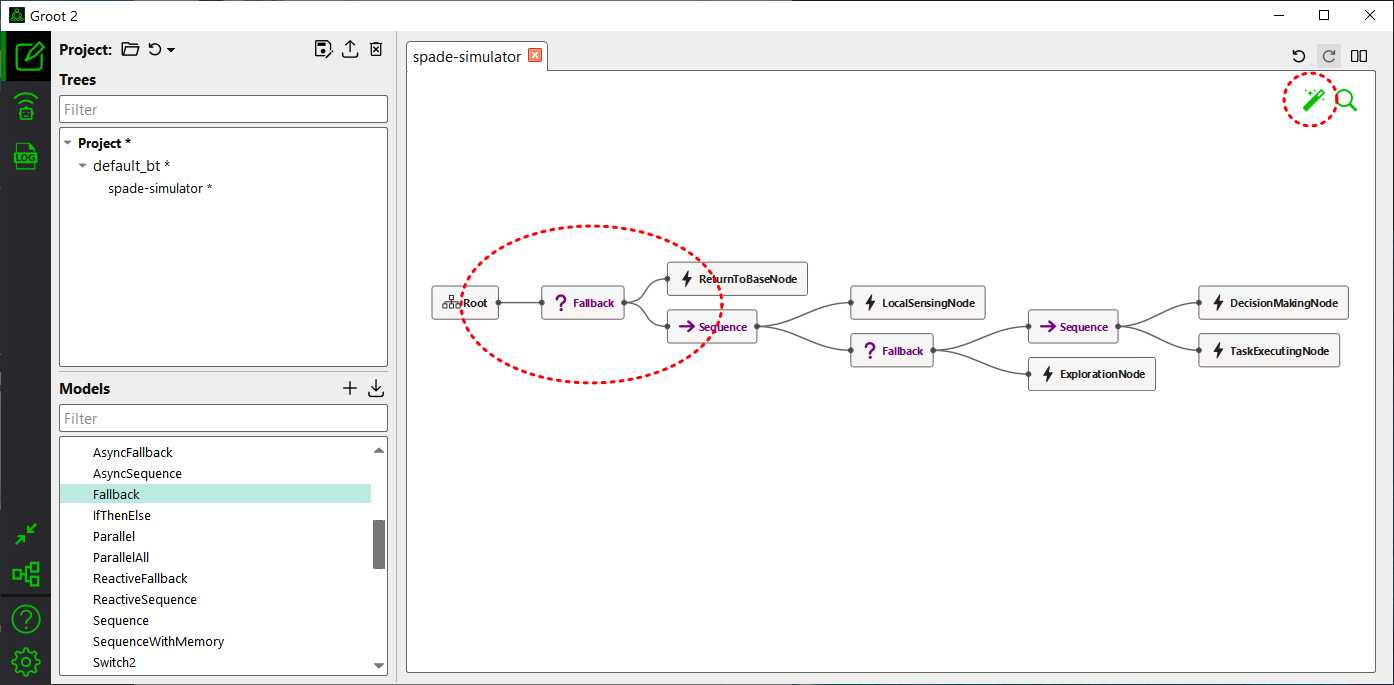
Figure 5: The modified behavior tree
Note
If you click the magic wand button in the top-right corner of Groot2, the BT nodes will be automatically rearranged.
Next, save the modified behavior tree as /bt_xml/new_bt.xml.
You can download the file: new_bt.xml.
Step 3 - Implement the New BT Nodes in modules/behavior_tree.py
The next step is to implement the newly created ReturnToBaseNode node as a Python class in modules/behavior_tree.py.
Technically, nodes like ReturnToBaseNode are known as BT action nodes. In the current version of the simulator, BT action nodes such as DecisionMakingNode, TaskExecutionNode, ExplorationNode, and LocalSensingNode are already implemented. You should refer to these BT action nodes when implementing the ReturnToBaseNode node.
The basic structure of a BT action node is as follows:
class NewActionNode(SyncAction):
    def __init__(self, name, agent):
        super().__init__(name, self._new_action)
        # Implement any initialization

    def _new_action(self, agent, blackboard):
        # Implement any behavior

        return Status.SUCCESS # or Status.FAILURE
As described in Step 2, ReturnToBaseNode node will be implemented such that:
The agent moves to the base if the task is completed.
If the task is not completed, the node will return
FAILUREto allow the rest of the BT to continue.
For example, we can implement as follows:
class ReturnToBaseNode(SyncAction):
    def __init__(self, name, agent):
        super().__init__(name, self._return_to_base)
        self.return_to_base_mode = False
        self.depot_pos = pygame.Vector2(700,500)

    def _return_to_base(self, agent, blackboard):
        # Check if the assigned task is completed
        if agent.assigned_task_id is not None and agent.tasks_info[agent.assigned_task_id].completed:
            self.return_to_base_mode = True

        # Move to the base if the task is completed
        if self.return_to_base_mode:
            distance_to_base = (self.depot_pos - agent.position).length()
            if distance_to_base > target_arrive_threshold:
                agent.follow(self.depot_pos)
                return Status.SUCCESS

            self.return_to_base_mode = False

        # If the task is not completed, return ``FAILURE`` to allow the rest of the BT to continue
        return Status.FAILURE
For more details of each line, please refer to API Reference.
Next, add the newly created action node to the BehaviorTreeList class at the top of behavior_tree.py.
class BehaviorTreeList:
    CONTROL_NODES = [
        'Sequence',
        'Fallback'
    ]

    ACTION_NODES = [
        'LocalSensingNode',
        'DecisionMakingNode',
        'TaskExecutingNode',
        'ExplorationNode',
        'ReturnToBaseNode'  # Added
    ]
You can download the modified file: behavior_tree.py.
Step 4 - Modify the config.yaml Settings
Update the following section in the existing configuration file:
agents:
  behavior_tree_xml: new_bt.xml # Was default_bt.xml
  ...
  situation_awareness_radius: 0 # Was 500
In this scenario, let’s assume that the agents have full awareness of all tasks within the environment. Since the scenario has been modified to require agents to return to the base before moving to a new task, agents might otherwise fail to detect tasks that are far away. For this, set the situation_awareness_radius to 0 (see Configuration Guide for more information).
Then, save the file as config_greedy_rtb.yaml.
You can download the modified file: config_greedy_rtb.yaml.
Run the Simulation
Now, let’s execute the simulation with the following command:
python main.py --config=config_greedy_rtb.yaml
Then, you will see a simulation similar to the following.
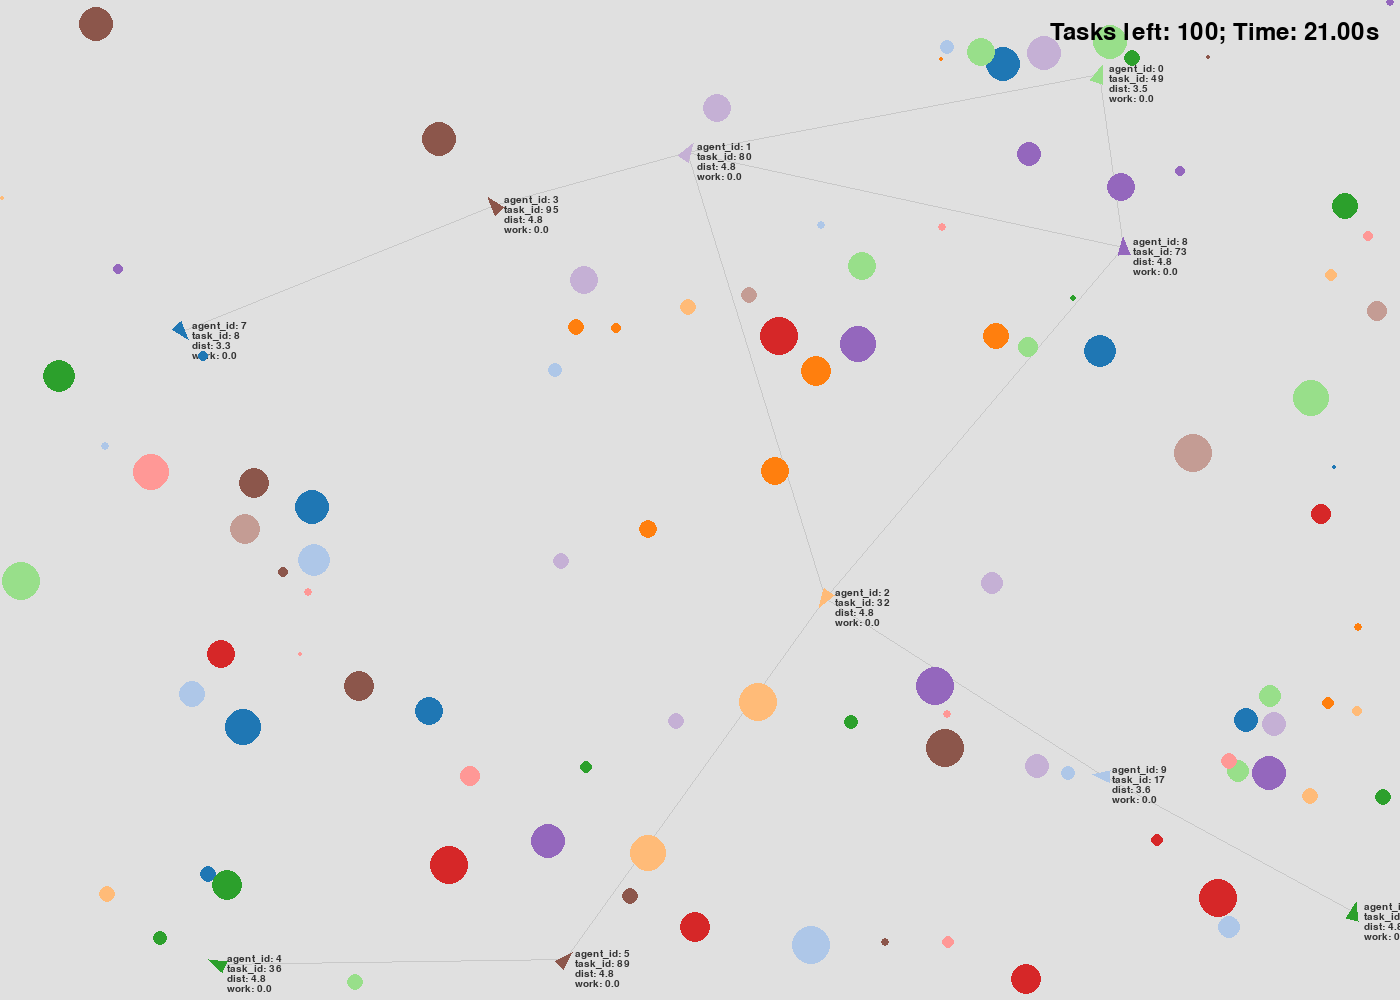
Figure 6: Simulation Visualization with ReturnToBaseNode